How to install Joomla! 3.0 – step by step
Hello!
Joomla 3.0 is on the horizon. For enthusiasts who want to install it yourself, I have prepared a small tutorial step by step how to install Joomla 3.0.
As you know 3.0 is an intermediate version, this means that the maintenance of it will be released after will last only a few months before coming Official Release of Joomla 3.5.
Joomla is a powerful CMS, and therefore there is no doubt. Developers and this time got the fitting of 3.0 to be a pleasant experience.
What you need for the installation of 3.0?
- Fresh copy of Joomla 3.0 – you can find it here or Joomla.org
2. Depending on whether you are installing on localhost or on a remote hosting you will need
3. (However, if you install a localhost, you will need a local server and it is easy to download and easy to install, I use xampp for Windows – here),
If you use another operating system, open http://www.apachefriends.org site and discover your appropriate xampp (available XAMPP for Mac OS X, XAMPP for Linux, XAMPP for Solaris, XAMPP for Windows and free.)
The installation of this server is just as easy. (Next, next, next … finish)
- For installation Localhost – MySQL client I use Heidy SQL – can be downloaded here -
- For installation on a remote server – should open phpMyAdmin
These are practically enough things. So we can start
1. Create a database, it sounds scary, but it is quite easy and simple.
- If you are on localhost – open Heidy SQL already installed and select Create New -> assign a name to whatever you want (eg joomla-able 3-0)
- If you are on a remote server – via cpanel – go to MySQL Databases and create a new database – a user name and password
- If you use phpMyAdmin – in the same way as in cpanel create a new database – a user name and password
2. You must extract archive files of the place that you have decided to install Joomla 3.0 on localhost is assumed that the way your browser must be
something like http://localhost/joomla-3-0
joomla-3-0 (the folder you created, and the name can be any of your choice)
3. So far things have been difficult.
Come easily after opening the browser and typing http://localhost/joomla-3-0 will appear Installation wizard of Joomla 3.0, there is now a change of
versions 1.5 and 2.5. It is obvious that developers and designers have tried Joomla.org. The interface is different, but the functionality is not different at all.
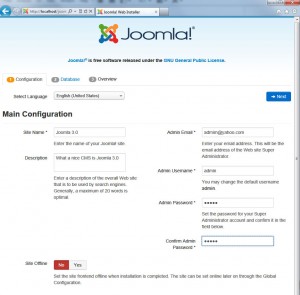
4. At the first screenshot I showed how you look what you can find.
- Installation consists of three steps
1.Configuration – Main Configuration – the stars were marked fields are required.
Select Language – choose your language
Site Name * -
Admin e-amil *
Admin username *
Admin Password *
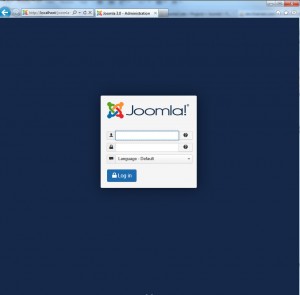
These will be used on the rear panel of Joomla.
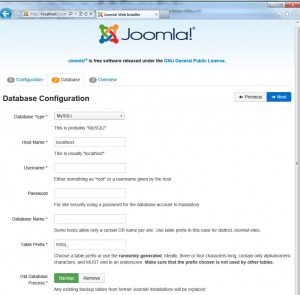
2.Database – Database Configuration – poletatata fill the information you have.
You can choose the type of database you leave as:
Host Name * – localhost (often in remote, server (cpanel) it is localhost)
Often the root e username – Joomla and will advise.
Once you have filled all comes the next step
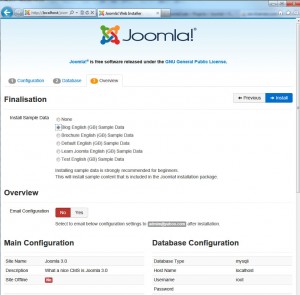
3. Overview – Finalisation
It will now ask you, kakvav Sample data type to install, it will now be up to you, depending on what you use Joomla 3.0
I will choose Blog English (GB) Sample Data and click Install
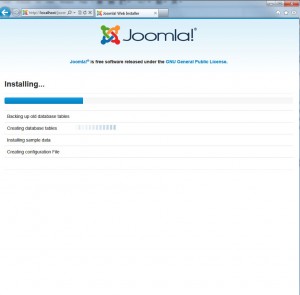
We will show the following screen – waiting
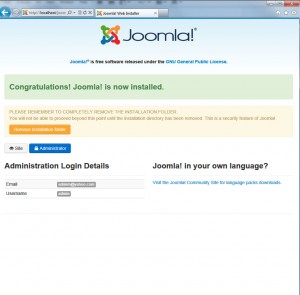
4. You will then see the following inscription PLEASE REMEMBER TO COMPLETELY REMOVE THE INSTALLATION FOLDER.
Press REMOVE INSTALLATION FOLDER
and you’re done!
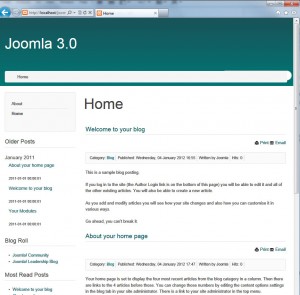
5. Have ready installed Joomla 3.0
Hope you liked tutorial.!
Tags: how to, install Joomla 3.0, joomla 3.0
